

Happy fall, y’all! With cooler temps finally here, I’ve finished painting our little hallway, what I started calling our Hall of Mirrors. Let’s talk about painting your hallway and small spaces…

We have been living with coffee-colored walls throughout the whole house, including each ceiling, for the past 4 1/2 years. The paint was fresh when we moved in, but it turns out this is the original coloring of this house. Our neighbors across the court have a lighter version of this paint color on their walls and ceilings, which I would have loved!…

.
Begin with your ceilings
Always begin by painting the ceiling in any room. Once it is done, you won’t have to redo it for YEARS! 🙂 With wall color, you can change that whenever you like. It seems that walls get painted every few years anyway compared to ceilings as our styles change or we want to refresh a room’s look as walls get scuffed and have lots of little fingerprints and dirt on them.
Buy scrubbable paint – In bathrooms and high-humidity areas, it used to be recommended to use gloss paint for its durability and ability to handle humidity without peeling.
I like eggshell or low-sheen paint for walls, and satin paint for ceilings and mouldings. I like a light shine on my ceilings to bounce light into our rooms, but you may not like any sheen on your ceilings. It can highlight any flaws in your ceiling’s plaster or wallboard.
Use an angled paint brush – A sash brush has a beveled edge with angled bristles ~ perfect for cutting-in around mouldings and for edging. This type of brush is able to create a finer painted line underneath ceiling moulding and around door frames, etc.
The idea of painting a ceiling first sounds so simple but it is best! It keeps paint from dripping onto freshly painted walls so paint those ceilings! Even if you hate painting ceilings; get ‘er done. 😉
As you paint, cut in around the mouldings and ceiling either first or last, then paint with a roller. I like to do the cutting in work first then roll paint right afterwards. Roll in even strokes with a light enough amound of paint on the roller so it doesn’t drip. Even though manufacturers tout that you can paint with just one coat, do two.
It covers better and won’t leave small vits of the previous color showing through the new paint. If the paint color you are trying to cover is very dark, use a primer like Kilz first then two coats of the new paint. The primer seals in the previous darker color so only the new color will show.
Protect your flooring and furniture – Always put down plastic to protect your flooring and drape sheets of plastic over any furniture or items left in a room as you paint. In a pinch, kitchen and garden waste black trash bags work well spread over a floor when you don’t have sheet roll plastic.

.
Beginning to paint the hallway
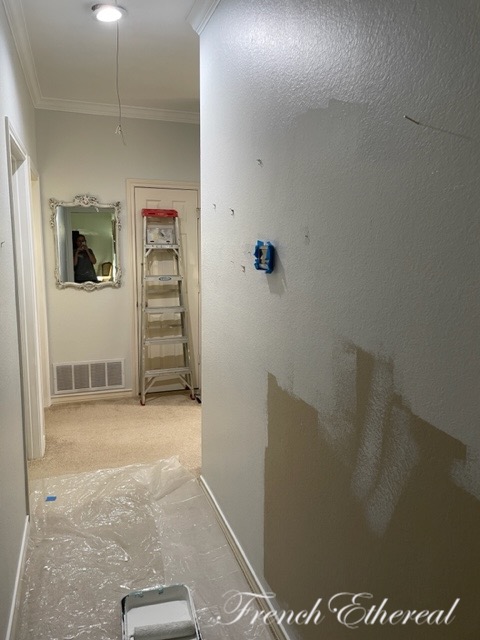
The usual way for painting a hallway ceiling and walls is to begin painting at one end then working your way along to the other end. In our case, I began in the middle right where you see the ceiling partially done at this hallway turn.
I began painting at this corner as I wished to paint the wall below it straight away. I was trying to get the wall below this area done in order to rehang the mirror which is usually hangs there.
So, start painting your room’s ceiling wherever you want. 🙂
When a couple of coats of paint and a few touch-ups spots are painted and dried, the ceiling will look just as good as if you began at one end and painted straight to the other end. Just marry up the edges and go over any lightly coated areas with extra paint to blend it together.
.
Why do small areas seem to take so long?
The final room I have to paint is our small secondary bathroom and it does seem to take just as long to paint as a much larger room. This is due to all the things in the way which cannot be removed ~ like the built-in sink, the combination shower/tub, the toilet.
Having to work around these things moving a ladder at odd angles makes the job a little tougher.
Enjoy the process as you will love the results!
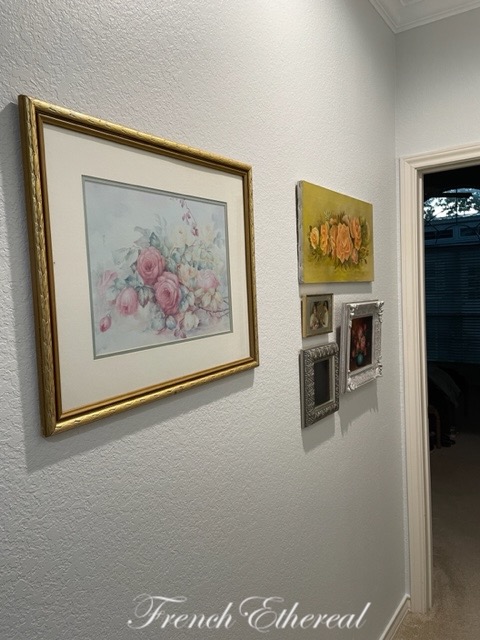
Our hallway ceiling and walls turned out great! I am still painting the doorway mouldings, baseboards (my least favorite things to do) and eventually all of the doors. I am really happy with how the ceiling and walls turned out!

What do you think? Yea or nay?

Are you working on any painting projects in your home? Soooo glad to be on the home stretch with all this painting. The house feels so much lighter now. It’ll be nice to have all of the rooms feel brighter in wintertime when we have less sunlight, especially in our living and family rooms.
Let me know what you think of our hallway’s new look,
Share this:
Discover more from French Ethereal
Subscribe to get the latest posts sent to your email.
I’m impressed. My whole house needs painting but the thought of doing it paralyzes me! Well done, Barb!
Looks great, Love the fresh new color!
Barb,
Love the way it looks…Painting our upstairs wall and taking down the wall paper border has been on my To Do List for almost 6 years now…I also have to paint the door frames up there too on the bathroom and bathroom doors…Hopefully,next Spring! Thanks again for stopping by and thanks too for the feature!! I really appreciate it!!
Hugs,
Deb