

Happy March, everyone! This past weekend while I was recouping from eye surgery (cataract), I worked inside making this balloon curtain. Making one is super easy and here’s how to do it!

I found this inspirational fabric at Hobby Lobby (Slate “Friend” print cotton calico, #1415181) after my first follow-up appointment at the eye doctor this past Thursday. Gramma Gini was driving since I wasn’t allowed to be out driving yet, and we didn’t feel like going right home, so we went browsing for French toile fabric.
I didn’t find the fabric I was looking for but instead I found this soft brownish-grey, almost a toile, instead…
I’ve loved seeing words cut out and hung on other bloggers’ walls or sitting on their fireplace mantels, but I haven’t really got into all that… until now! This is my attempt at adding words in our kitchen. 🙂

How to make a balloon curtain
I have written this as if the reader has never sewn, so bear with me if some of this is repetitive. Feel free to jump ahead if you are more experienced! 🙂
- I bought 3 yards of fabric for this project. When you make a balloon shade/curtain, you will need three panels of the same width and length.
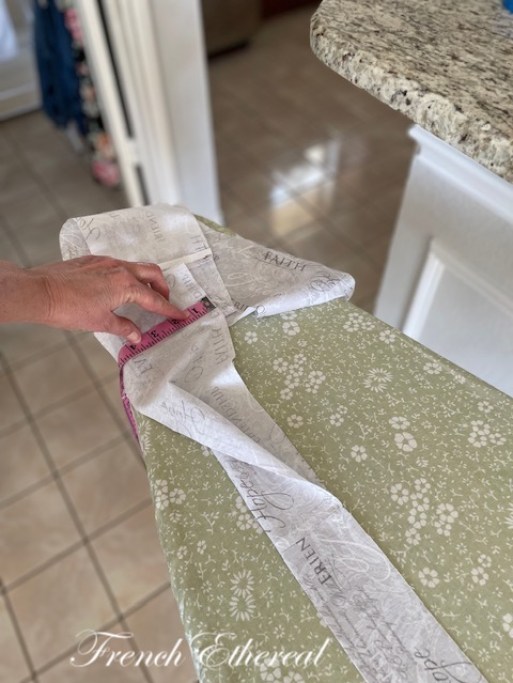
- I washed and dried my fabric, then cut the 3 yards in half crosswise to have two beginning panels the same length of 1 1/2 yards (54″).
- Next, cut both pieces of fabric lengthwise down the center of each piece, creating four lengths of equal width fabric.
- Choose three pieces and seam them together lengthwise: If you wish to make French seams, begin by sewing on the right-sides out ~ sewing a 2/8″ seam.
- Iron the seam flat, then place right-sides together (the normal way one creates a seam). Sew a 3/8″ seam on the wrong side encasing the first 2/8″ seam. This closes the first seam inside the final seam so no selvage shows. Very clean! (see photo above)
- Sew both side seams, turning under 1/4″ once, twice. Sew along the turned-under edge.

- Make a header next by first ironing under 1/4″, then turn a second time 2 5/8″. I began with an extra 5 1/4″ of fabric to create the rod pocket and small ruffle.
- Sew close to the turned under edge and a second seam 1 1/2″ from this lower edge. This leaves 1″ at the top for a small ruffle when the curtain is gathered along the curtain rod. To prevent “pulling,” sew from the middle outward in one direction, and sew the rest of the top-stitching from the middle outward in the opposite direction.
My sewing machine has measuring lines on either side of the metal sewing plate (see photo below) and also along slide-on table, which I slid onto my machine’s sewing arm.

- This creates a rod pocket for a 1″ curtain rod with a 5/8″ ruffle along the very top of the curtain once run on the rod.
- Sew a 1″ hem at the bottom of the curtain with 1/4″ ironed under first. (For a curtain without a ruffle).
- If adding a ruffle, cut the remaining 4th panel of fabric into 5 1/2″ strips width-wise. Seam those together on the wrong side, then iron in half width-wise, right side out.

- Sew a basting line 1/4″ from the upper edge of the ruffle and a second baste line 3/8″ from the same edge. Don’t do the “sew from the middle” here. No need as you want the pulling effect. *Sewing from the middle works really well for clothing to keep it from pulling around you, feeling uncomfortable when a garment is worn.
- Pull the bottom threads and adjust your gathers to the fit the bottom edge of the curtain. Pin to the curtain.
- Sew a 1/2″ seam at the bottom of the curtain after gathering the ruffle. Iron the seam flat towards the curtain. Tack the seam just to the bottom of the vertical seams, in those four locations.

Note: Here I’ve added the gathering rings. The lowest rings were too far down (shown in the photograph) and I removed them and moved them up two inches higher so the ruffle could be seen when the curtain is hanging.
I am getting a little ahead of myself but you’ll see more of these rings below. 😉

My inspiration
Years ago I found these pink rose curtains at Mervyn’s department store (went out of business sometime during the 1990’s, during a recession), and hung them at my first home in California.
I remember buying them one or two panels at a time as I couldn’t afford to buy them all at once! I think each panel cost $14.00 at the time. Maybe they were more, but I’d wait for a sale. 😉

These balloon curtain panels came with these slotted rings to gather up each row of rings making gathering each balloon curtain soooo much easier than adding strings and trying to pull them all correctly.
I tried looking at Joann Fabrics but found none of these special rings. I brought home little lobster claws to try but they were too tiny to gather four rings into each claw. They will go back to the store.
So, I “borrowed” four of these slotted rings from my inspiration panel to gather my freshly created Friend curtain.

In my stash of things, I had leftover large and small rings from when I made a blue calico balloon curtain for our USMC Camp Pendleton, California duplex we lived in when Mr. Ethereal was promoted to Captain. We lived on base for two years in that nice duplex! (1989-1991)
This is how I know about pulling the strings and trying to get them equally pulled across the curtain… ugh! You had to tie the bunch of strings off to one side to a hook thing mounted on the wall.
It was crazy…

- For this curtain, I needed 16 rings for the whole curtain, with four across and four down. Begin them at the bottom of the header rod pocket and sew them to each of the side seams and middle French seams.
- Sew the second, third and fourth rows, spacing evenly apart. My panel ended up being 48″ from the header hem to the ruffle seam (Sorry, I forgot to show!). Fix the bottom row of rings as needed to make a curtain ruffle show when hung in the window.

I am really pleased with how this balloon curtain turned out! Mr. Ethereal helped by hanging the curtain rod hangers on the wall about four or five inches above the window opening (maybe higher).
I wanted to let in a lot of light yet still have a lot of drape to the curtain, hence why we hung them so high on the wall. With balloon curtains, you can hook up all of the rings or less, depending upon the look you desire!

Love how this balloon curtain dresses up this window! Jewelry for the finished kitchen and its new paint job!!
Let me know if you’ve ever made balloon curtains before and if you have found these special slit rings. I’d love to know a good source and what they are actually called. Gini thought that I might find some at an upholstery shop. I might go searching as we have this week off from school.
Happy spring!!!
Happy sewing, dear friends,
Barb 🙂
How beautiful, nice work! Ive been sewing since I was 13 and I’m 58 now. It’ been awhile since I sewed window coverings..going to save your post for later!
Valerie
http://www.mapleeleopard.com
I’m so glad you like my balloon curtain, Valerie! I go through phases of wanting to see. I’m just a few years older than you (61). Happy Wednesday! 🧵🪡
Barb, congrats on getting cataract surgery. I had it done 18 months ago and it is amazing. It’s wonderful to see a crystal clear and colorful world again. You’ll love it.
Thank you, Carol! The great vision comes and goes. The doctor said after the second eye, then the brain learns how to work with the new lens. I got a contact for my right eye until I can get the second one done. I do love seeing just one moon! Thanks again! ☺️💕