

Happy (Almost) New Year, friends!!! These past two weeks off from school for Christmas break have been wonderful ~ and full of projects! Let’s check out our garden fence project…

Christmas afternoon found me outside digging an 18″ hole in the ground for the cement post I stained on a weekend a couple of weeks ago. Here, Mr. Ethereal is helping me figure out where the edge of the metal “stand” will go (the edge of the spray painted line) when cemented inside the paper tube we put in the ground as our cement holder. *Very technical, of course… 😉

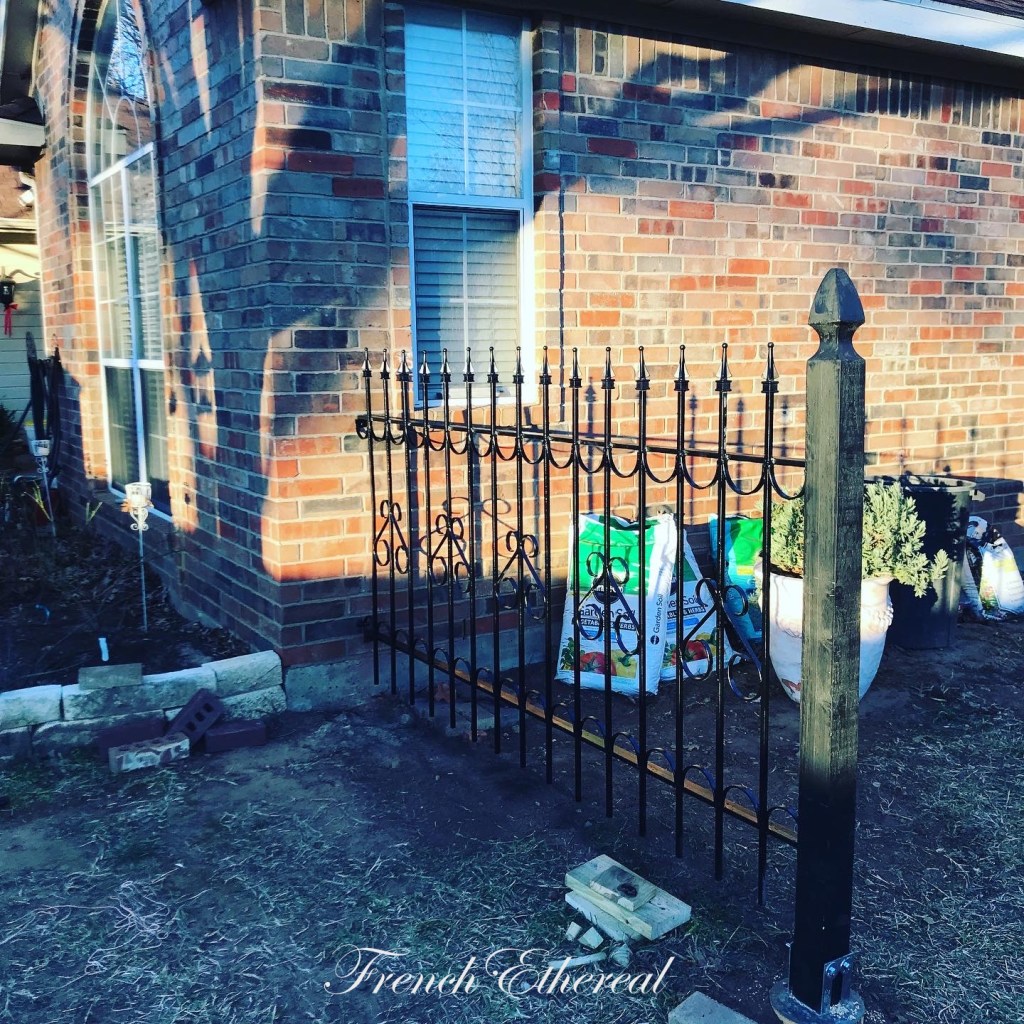
We had different ideas on how to approach the project but I always need the “visual” so propping the fence up against the house helped me decide where it needed to be positioned against the wall and where it would stand in the yard. Also, how high it needed to be once mounted on the wall and post.

Running a plumb line from the house wall to the fence opposite, we used a metal square to make sure the line was 90 degrees square to the house wall. Here Hubby is spraying the string prepping for adding the post holder tube.

Charles mixed most of the 80 lb. bag of Quick Crete concrete and I helped finish mixing by scraping the side of the wheelbarrow and adding small amounts of water with our garden hose. 🙂
I do like mixing cement as it reminds me of mixing cake batter!
Except with a lot of teeth-breaking rocks in it… Lol!

Here is my hero looking glamorous!!! He cut the tube down to 18″ and backfilled and packed the area around it with dirt, then I got to put in all the cement. We have laid cement floors for two sheds at both of our last homes, plus I poured the self-leveling cement at our last home when I ripped up the carpet to lay travertine in our dining/living room. So we aren’t strangers to cement work, but if you haven’t ever worked with cement, you need your “batter” to be wet but not soaking wet.
While Mr. E took a short break, I shoveled small amounts of cement in the tube and gently tamped it down, then added the next scoop until it was 1″ from the top. Hubby came in and helped level the post hole metal holder in all three planes, using the plumb line run through the middle of it as a guide to keep the center still centered on the wall.

The next day…
The next afternoon we brought over the fence again and marked where I wanted it to ultimately be attached to the wall. It’s not exactly where I wanted it, but it’s good enough. We had a discussion about how high off the ground it should be (because of plant requirements needing good drainage, I’ll be raising each plant a few inches.), so it’s a little too high on the right side where the ground slopes away from the house but I will just build up the planting bed there.
That’s all on me since I marked the wall… 🙂
I didn’t get any photographs of the metal galvanized mollies that went into the wall or the 2 1/4″ L x 1/4″ w bolts, but the bottom molly was off by 1/8″ (Hubby’s mistake), so we had to go to strapping the lower part ~ a Plan B ~ which turned out just fine.

Happily I had already painted some extra straps from when we hung the Garden Fence over on the garage earlier this year. Here it is behind our Garden Maiden! For the new French fence install, I just hit the strap with a little matte black spray paint and it worked perfectly!

I am really pleased with how this French-style fence turned out! Because 4″ x 4″ posts are really 3.5″ x 3.5″, we added 7 large washers each around the two bolts at the bottom of the post for stability. It is good and solid now.


It whomp-whomped a couple of times in the wind the first night it was installed (it wasn’t tightened yet), so the extra washers were added on the third day.
If you ever watch Garden Answer on YouTube, Laura and Aaron put in a garden fence around their kitchen vegetable garden which was stained a nice dark chocolate brown-black and I really liked that look. I copied that stain formula here for this wooden post and its twin, which will hold a fence piece opposite in the future.

Here we were using bricks and pieces of wood to hold up this side of the fencing as it is pretty heavy. After this I brushed off loose pieces of old paint with a metal wire brush. I posted a small video up on my Instagram.

The sun was going down but I was determined to finish this project! I did get it clean enough to spray the matte black paint on about an hour before dusk.


And here is our French style fence in all its freshly painted glory! Really excited to get planting around it making a new flowerbed. The pathway I began earlier in the summertime will extend between the fencing here and another fence piece, opposite this one, when I find another one, creating a garden room.
Many thanks to my sweet hubby for helping me with this big project!
He only had these four days off from part of Christmas Eve through Sunday. His goald for the weekend was to work on putting more insulation up in the attic and laying down boards for storage and for safely walking around, so this was a big sacrifice… He did get some of that done, too.
So what would you plant here?
Here’s to a wonderful 2021,
Barb
Share this:

Discover more from French Ethereal
Subscribe to get the latest posts sent to your email.
2 thoughts on “Adding French Fencing to the Sideyard Garden”
Comments are closed.