

It is no secret that I love candlelight and its pretty glow. It is amazing to me how so much beauty can reflect out of even just one little candle in its candleholder.
During the evenings especially when daylight savings ends it is nice to light up several candles in their beautiful candleholders ~ small and large ~ creating different looks and that magical amber flicker and glow.
Today I’ll show you how to create your own tall candlesticks or altarsticks to use
in your decor…

This is a photograph I took of our former fireplace mantel which I decorated with tall altarstick candleholders, small tealight votives and vases full of pink roses. On this day I think I used every one of my tealight holders and delightfully the combination worked. 😉
Inspiration for creating these candlesticks was found over at Cedar Hill Farmhouse where Anita shared her beautiful collection of contemporary and vintage candlesticks ~ some she found and others she created. The first ones I had seen like mine though were in a post written by another favorite blogger Cindy of Edith and Evelyn.
 |
| A photo from a post I wrote about Sarah, the Duchess of York, and finding these Wedgwood pieces. |
Candlesticks come in various shapes and were readily available a number of years ago. Here in these next photographs you can see how I used mine.
Some of mine were painted dark brown when I purchased them and didn’t go with my look so on those I lightly dry-brush painted those white. Often these candlesticks are made of metal or wood and can be picked up at flea markets and thrift shops for decent prices.

Since they aren’t always available when you want them or are so expensive making them a bit out of budget, it’s easier to look for candlesticks in another form. That is why I am suggesting that it’s not too hard to create your own candlesticks or altarsticks out of old table lamps.
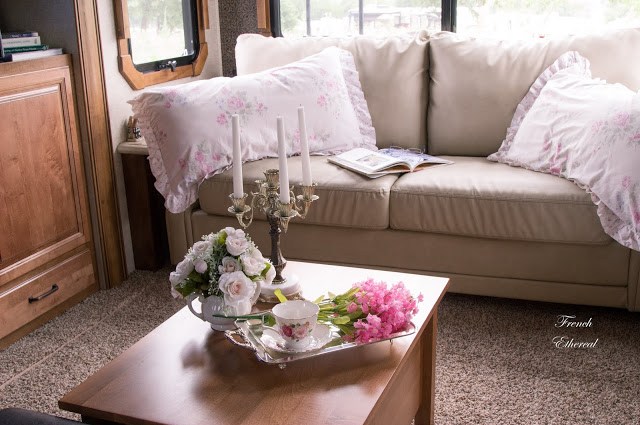 |
| Not really an altarstick but since this candelabra is two-toned and very beautiful, I thought I’d put it in here. 😉 |
How to create your candlestick
First you’ll need to find a few old lamps at a garage sale or thrift shop to refashion into candlesticks.
Next take off the harp, the candle sleeve and all the wiring and lamp parts saving those for other projects if in good condition.
Fill in any holes with wood putty, sand those areas and paint over to match. If you want to change the look of your candlestick then by all means do paint with new colors and gild it!
🙂
 |
| Another way to display candles ~ in a sweet basket. From a post about English candy boxes. |

Here are the lamps in their original conditions.
For the front lamp base I liked its original look so after filling the hole in the base I just tried to match the mottled look it already had. I used my stencil brush and pounced on greys, a little sage green matching Annie Sloan’s duck egg blue, some brown and gold to blend over the filled hole. I added just a bit of silvering as highlights to bring out the details on the piece. I did use a jigsaw to cut off as much metal left from the lamp around the upper disk as I could.
See this photo below and compare to the next one following.

Tool you may need
pliers ~ needle nose and wire cutters and any other pliers for removing nuts and pulling out wiring.
wrenches ~ also for removing nuts and for removing lamp parts as needed.
drill ~ for anything that needs to be drilled out or drilled to hold a candle. Good tool which can be used for adapting your lamp base into its final candlestick redo.

paint and paint brushes ~ use paints which will work on your project (for wood or metal). Have a number of paint brushes available in several small sizes for getting in small spots. A stencil brush is perfect for “pouncing” paint onto areas.
sandpaper ~ for sanding sharp metal or wood edges as needed.
wood ~ you may need to shape a piece of wood like I did for the more ornate candleholder so keep a piece of 1/4″ to 3/8″ thick luan board around, just in case.
jigsaw or hacksaw ~ for cutting through metal or wood and for creating wood pieces to add to your candlestick as needed. Have the right blade for the material being cut, too. *ps ~ Wear eye protection.
glues ~ I picked up some JB Weld and Gorilla Glue gluesticks (stronger than regular gluesticks) for anything I’d want to bond to each candlestick. This time I used JB Weld to really secure the wood disk I cut out with the jigsaw to add a place to hold a candle to the ornate lamp base/candlestick.
 |
|
This is the lamp base I am calling the Ornate Candlestick ~ love its
egg and dart-type moulding around the body and footing! The rear
lamp base/candlestick has had its the metal top piece cut down.
|
For the more ornate lamp base I painted on duck egg blue chalk paint then added a darker grey into the crevices and lighter grey to highlight. I went back later and add a little more blue to bring out other features.
Lastly I used my finger and lightly added silver highlights to the edges making it not too dark or perfect as I was looking for a worn look. I also added silvering around the rings and to the egg-and-dart moulding around the base and body.
Really love how it turned out!

Here you can see where I was rubbing off some of the fresh paint as I went ~ this gives the piece that vintage Old World French look with lots of yummy layers of paint showing through. Perfect imperfection!
🙂

In this next photograph I was dry brushing on the second layer of paint, the darker grey ~ building the paint layers for wiping back later on. With each layer you paint here and there on your candlestick, you’ll get that rich look seen in expensive pieces found at designer stores for a fraction of the cost.
Each of these were fully-working lamps I found for $5.00 or less. The really ornate lamp base I picked up for $2.00 as it was half-price day!
 |
|
A couple of the chalk paints I used: DecoArt Americana Decor
Chalky Finish ADC27 (is a medium grey) and for the green-blue I used
Plaid/FolkArt Home Decor chalk paint in Sage #6351.
|
For the brown lamp I painted on greys then layered on cream and went back and added more greys in light grey and a darker grey chalk paint. Another tutorial I did earlier this summer on the nightstand in the background shares more of these paint techniques and can be found here and here.
 |
|
For silvering and gilding, I used Amaco’s Rub’nBuff in Silver Leaf and Gold Leaf.
This photograph shows several things including the wood filler/putty used to fill
the holes left on each lamp base/candlestick when the lamp wiring was removed.
|
When I got a look I liked, I took a small paintbrush and added a light layer of gilding around some of the candlestick’s rings. You can do this with just your finger, too.

Here they are when they are all finished.
But first…


A couple of circles of slightly graduated sizes had to be cut from lightweight birch luan to create a place for a pillar candle to sit on the ornate candlestick.
If you are cutting circles look around your kitchen for anything which is the size circle you need and trace around it.


After a light sanding the disks were glued together with Gorilla Glue ~ very strong and it fills in crevices.
After drying for a few hours I measured and marked the center of the bigger disk (this will be my top) and drilled through it.

Place a piece of scrap wood underneath so you don’t damage your table. I used a doubled-up piece of cardboard and was careful with drilling ~ that’s what this photo is showing.
Then using your drill, hold your disks and drill back and forth through them a few times to widen the hole and to smooth the center. The metal piece on the ornate candlestick was 3/8″ and that’s the diameter drill bit I used.
Definitely measure any lamp screw on your lamp bases if you are leaving them but will be adding wood like has been done here.

If your lamp base has a central open screw surrounded by resin and another lip you can try to drill out the center for a tall taper candle (my original intention for this lamp-turned-candlestick).
The center pieces weren’t coming out without chisels so I went ahead and used a hacksaw to saw off the remaining wood, resin and metal screw tube in the center.


In the evening I was able to finish painting these two candlesticks along their tops after filling in the openings with some Gorilla Glue and wood filler.


So… a little before and after.

 |
| Taken with an old camera phone ~ maybe my iPhone 4… Love this one! |
Just found this photograph on Facebook that I took about six years ago so am adding… Love my sweet daughter Amy with these candlesticks ~ I think they will all go well together, don’t you?
*This post was featured at:
Thursday Favorite Things ~ The Eclectic Red Barn
Thank you so much, Bev!
Thank you for featuring us, Mary!
Thank you so much, Amber!
Sharing with
Make It Pretty Monday ~ The Dedicated House
Happy crafting,
That is amazing. I love these.
You did a great job. They are beautiful.
You did a great job. They are beautiful.
These are amazing. Such a brilliant idea.��
Very nice tutorial and what a clever idea! They look beautiful, too. Thanks for this. Nice work. (Don' forget to send your address!)
I absolutely LOVE these! What a smart idea, and I will never look at thrifted lamps in the same way! Off to my local thrift store! Pinning!
Thank you, Katie! I appreciate it. <3
Thank you, Katie! I appreciate it. <3
Thank you, Thel! They were fun to make. 🙂 Thanks for stopping by. <3
Thank you, Thel! They were fun to make. 🙂 Thanks for stopping by. <3
Thank you! I appreciate your sweet comments. <3
Thank you! I appreciate your sweet comments. <3
Yes! Sorry, I need to do that… Thank you, Jeanie! <3
Yes! Sorry, I need to do that… Thank you, Jeanie! <3
That was me! I was gung ho to make some. 🙂 Thank you for the pins!!! <3 Happy crafting!
That was me! I was gung ho to make some. 🙂 Thank you for the pins!!! <3 Happy crafting!
Love this idea Barbara! Pinned
Love this idea Barbara! Pinned
What a wonderful idea. I love the look of these and such a great way to use old lamp parts.Please stop by Thursday Favorite Things since you are being featured.https://eclecticredbarn.blogspot.com/2018/11/thursday-favorite-things_14.htmlHugs,Bev
What a wonderful idea. I love the look of these and such a great way to use old lamp parts.Please stop by Thursday Favorite Things since you are being featured.https://eclecticredbarn.blogspot.com/2018/11/thursday-favorite-things_14.htmlHugs,Bev
Thank you, Cindy. <3 I appreciate it.
Thank you, Cindy. <3 I appreciate it.
Hello Bev, thank you so much! I appreciate your lovely comments and the feature. <3
Hello Bev, thank you so much! I appreciate your lovely comments and the feature. <3
Oh this is such a fabulous post! I see beautiful lamps all the time but I don't have any space for them. Now I might change them into candles holders for my mantel!Thanks so much for sharing at TFT. Featuring you today!
They turned out so pretty. No one would believe they started out as old lamps.Thank you for sharing the inspiration and the tutorial at The Really Crafty Link Party. Pinned.
Barbara you have done a magnificent job of repurposing those old lamps. I am going to share this post on my upcycle group.
Barbara you have done a magnificent job of repurposing those old lamps. I am going to share this post on my upcycle group.
Thank you so much, Amber, for featuring this post! I appreciate it. <3Happy Thanksgiving and I'm happy to feature a post of yours this week (11/21).Barb 🙂
Thank you so much, Amber, for featuring this post! I appreciate it. <3Happy Thanksgiving and I'm happy to feature a post of yours this week (11/21).Barb 🙂
Thank you for your kind thoughts, Teresa, and I'm glad you enjoyed the tutorial. <3Happy Thanksgiving to you and your family,Barb 🙂
Thank you for your kind thoughts, Teresa, and I'm glad you enjoyed the tutorial. <3Happy Thanksgiving to you and your family,Barb 🙂
Thank you, Mary! I appreciate the share. <3 These candlesticks were really fun to work on and, of course, now I am looking for more… ;)Happy Thanksgiving to you,Hugs and blessings,Barb 🙂
Thank you, Mary! I appreciate the share. <3 These candlesticks were really fun to work on and, of course, now I am looking for more… ;)Happy Thanksgiving to you,Hugs and blessings,Barb 🙂
What a terrific idea!